Floppy drives, even though they are mostly obsolete, can still be used in older computers and systems. If you’re using an old-fashioned PC or with a floppy drive, understanding how to remove the bezel of the floppy drive is crucial. Whether you want to clean the disk, change it, or upgrade your computer’s components, removing the bezel on your floppy drive is the first essential step.
This complete guide will walk you through effectively and safely removing the floppy drive’s bezel. We’ll also provide thorough instructions and troubleshooting advice to help you do it easily.
What is a Floppy Drive Bezel?
Before the removal procedure, being aware of a floppy drive’s bezel is crucial. The bezel is the plastic cover that covers the front of the drive. It is intended to hide the internal components of the disk drive, including its casing made of metal and mechanical components, giving your computer a more uniform, polished design. Bezels are typically part of the design of the front panel.
Floppy drives were utilized primarily in the last decade of the 20th century to read and write disks on floppy drives. But as technology advanced and floppy drives grew obsolete, they were replaced and were replaced with CD/DVD drives as well as USB ports. Although Floppy drives are not as common today, knowing how to take off the bezel on a floppy drive is still useful for people who work with older computers or those who are restoring older computers.
Why Do You Need to Remove a Floppy Drive Bezel?
- You may need to remove the floppy drive’s bezel and upgrade or replace your Floppy Drive for many reasons. If you replace the drive with the latest device (such as a contemporary DVD drive or USB card reader), You’ll need to remove the bezel to open the drive.
- Cleaning the case or drive In time, dirt and dust can build up on the bezel or inside the Floppy drive. The removal of the bezel allows you to wash the entire area.
- Repairs: If the floppy disk has begun failing, you may have access to the drive for repairs or to conduct an inspection. By removing the bezel, you can perform repairs on the hardware with no obstruction.
- Cosmetic Customization Some users prefer to alter the look of their PCs. Remove the old bezel on the floppy drive and replace it with a new one, or leave the space open to allow for more airflow.
- Recycling or upgrading: Removing the bezel is usually the best option for reusing the old drive or upgrading to a newer model.
Tools You Will Need
To make sure that you can take off the floppy drive’s bezel without causing damage to your components, collect the below tools:
- Small Phillips screwdriver This is needed to get rid of any screws keeping the floppy drive in place or the bezel.
- If your bezel is secured with clips, the plastic pry tool can assist you in removing it without harming the plastic or any of its components.
- An antistatic strap for your wrist (optional but recommended): It prevents the static charge from shattering the computer’s delicate components when you use it.
- Flashlight A flashlight could be useful for seeing the drive area and bezel, especially in dark inside cases.
Step-by-Step Guide: How to Remove a Floppy Drive Bezel
Follow these steps to ensure that you can safely and easily remove the floppy drive’s bezel.
Step 1: Power Off the Computer
Before working on your computer, ensure it is off and disconnected from the electrical outlet. This is essential to avoid electric shock and accidental damage to your components. If you’re working on a computer, disconnect all peripherals, such as the keyboard, monitor, and mouse, to clear the workspace.
Step 2: Open the Computer Case
When the computer is turned off, you must remove the computer case to access the Floppy drive. Based on the case of your computer, it is possible to take screws off the sides or the back. Certain cases have no tools, and it is enough to pull the side panel out.
After you have removed and reinstalled the side panel, you can inspect the case’s interior, including the Floppy drive.
Step 3: Locate the Floppy Drive
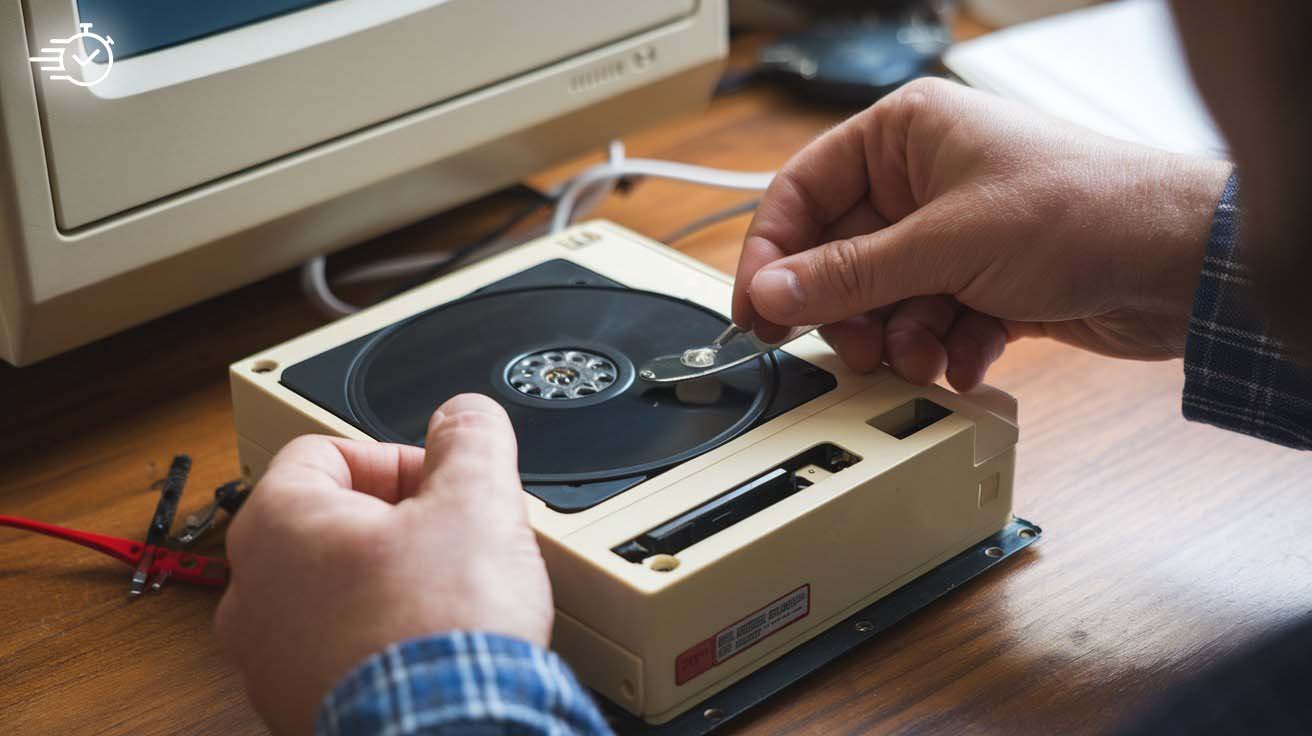
In most desktop computers, the floppy drive is located inside a designated 3.5-inch drive bay towards the back of the computer. The drive for floppy disks is rectangular and usually has an aluminum casing visible along the edges. The bezel, also known as an outer plastic cover, is affixed to the back of the drive.
Step 4: Identify How the Bezel is Attached
Bezels for floppy drives can be secured using two methods:
- Screws Some drive models use screws to keep the bezel in place. They are typically placed at the corners or edges of the bezel. If your drive is secured this way, then use a small Phillips head screwdriver to take out the screws. Be sure to set these screws in a secure area for the assembly.
- Plastic Tabs or Clips Most of the time, the bezels of floppy drives are secured by tiny tabs or plastic clips to their edges. It is possible to release these clips with a gentle tugging motion. Ensure not to damage the clips, as they tend to be fragile.
Step 5: Release the Bezel Clips
If clips hold the bezel of your floppy drive, employ a plastic tool and your hands to remove them. Begin by releasing one end of the bezel and proceed to the other edges. The clips are usually situated on the sides of the bezel. Therefore, applying consistent pressure while moving can help prevent breaking them.
When working with a pry tool, place it into the gap between your bezel and drive and gently move it around for a few seconds to let the clips loosen. Tips: If the clips seem particularly rigid or tight, don’t press them. Examine for hidden clips or other screws that could remain to secure the bezel.
Step 6: Remove the Bezel
Once all screws or clips are gone, carefully take the bezel off the drive. If you experience resistance, look for clips that may not yet be released. Once the bezel is completely free, could you place it in a safe location?
Step 7: Inspect or Replace the Floppy Drive
Once the floppy drive’s bezel has been removed, you can access it for cleaning, repair, replacement, or maintenance. If you’re upgrading to a brand new component, like a DVD drive or a USB card reader, it’s the right time to place it instead of the previous drive.
Step 8: Reinstall or Replace the Bezel
If you take the bezel off for cleaning or examination, you can return it after completing your task. To reinstall the bezel, align it with the front of the floppy drive. Then put it back in position, making sure that all screws or clips are securely secured.
If you’re replacing your floppy drive, you can remove the bezel, particularly when installing a new kind of drive incompatible with the same form factor.

Troubleshooting Tips
If you encounter difficulties you are having trouble with, here are some useful suggestions:
- The bezel won’t come off. If the bezel doesn’t come off, make sure you’ve checked for hidden screws. Some drives have screws tucked beneath the bezel, which must be removed before the clips are released.
- Broken clips: If you damage any clip, attach them using an adhesive bezel or remove it completely. The replacement clips are readily accessible online if required.
- A stout bezel: If your bezel has become stuck, slightly warm the area using a hair dryer for a minute or two. This can help release any glue that is holding the bezel.
Conclusion
Removing a floppy drive’s bezel is easy but vital to upgrading, fixing, and cleaning the computer. With the appropriate tools and patience, you can access the floppy drive and perform any needed repair or maintenance.
Following the step-by-step procedure, you can easily remove and replace the bezel of a floppy drive without damaging the components. Knowing how to remove the bezel is the initial step to a successful venture when restoring an old device, clearing up dust, or preparing for a new drive.
FAQs About Removing a Floppy Drive Bezel
Q1: What do I determine if my driver’s bezel is secured with screws or clips?
Check all edges on the bezel. If you can see screws, that’s likely the way it’s held. The bezel will likely be secured with plastic clips if there aren’t.
Q2 Can I safely remove the floppy drive’s bezel without causing damage?
If you’re not rough and use the appropriate tools, such as a plastic instrument, the bezel can be removed without damage.
Question 3: How do I get rid of the dirt behind the bezel of my floppy drive?
After removing the bezel, compress air or gently scrub the area using an abrasive, clean cloth. Beware of using cleaning liquids around the drive and any internal components.
Q4 Can I replace the bezel of my floppy drive by using a bezel from a different drive?
Yes, provided that the replacement bezel matches the drive’s dimensions and style. Many drives employ standard bezels, which means that they are easily swapped.
Also Checkout: How to Sell PC Parts Without the Box – Fast, Easy & Profitable